
Sew a lined brush-and-tool roll with fitted pockets
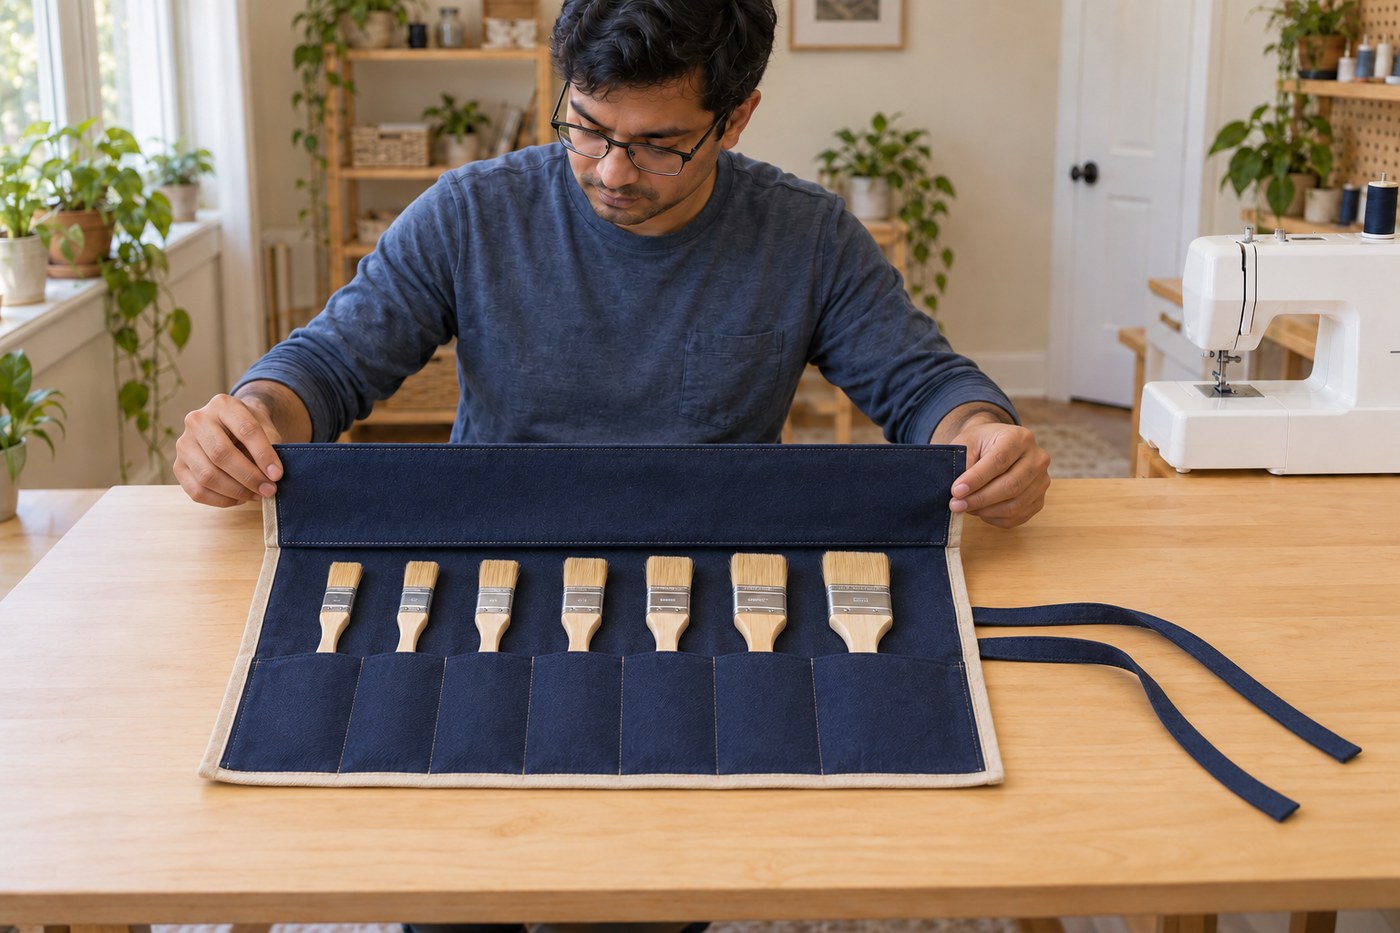
Build a lined fabric roll with custom-width slots, a retaining flap and two ties. The illustrated layout holds seven clean dry brushes20–24cm long.
What will you learn?
Build a lined fabric roll with custom-width slots, a retaining flap and two ties. The illustrated layout holds seven clean dry brushes20–24cm long.
Tools
- Sewing machineSearch Amazon Saudi Arabia ↗
- Machine needle suitable for the full fabric stackSearch Amazon Saudi Arabia ↗
- Standard presser footSearch Amazon Saudi Arabia ↗
- Fabric scissorsSearch Amazon Saudi Arabia ↗
- RulerSearch Amazon Saudi Arabia ↗
- Washable fabric markerSearch Amazon Saudi Arabia ↗
- Sewing clipsSearch Amazon Saudi Arabia ↗
- Seam ripperSearch Amazon Saudi Arabia ↗
- Blunt point turnerSearch Amazon Saudi Arabia ↗
- IronSearch Amazon Saudi Arabia ↗
- Pressing surfaceSearch Amazon Saudi Arabia ↗
Materials
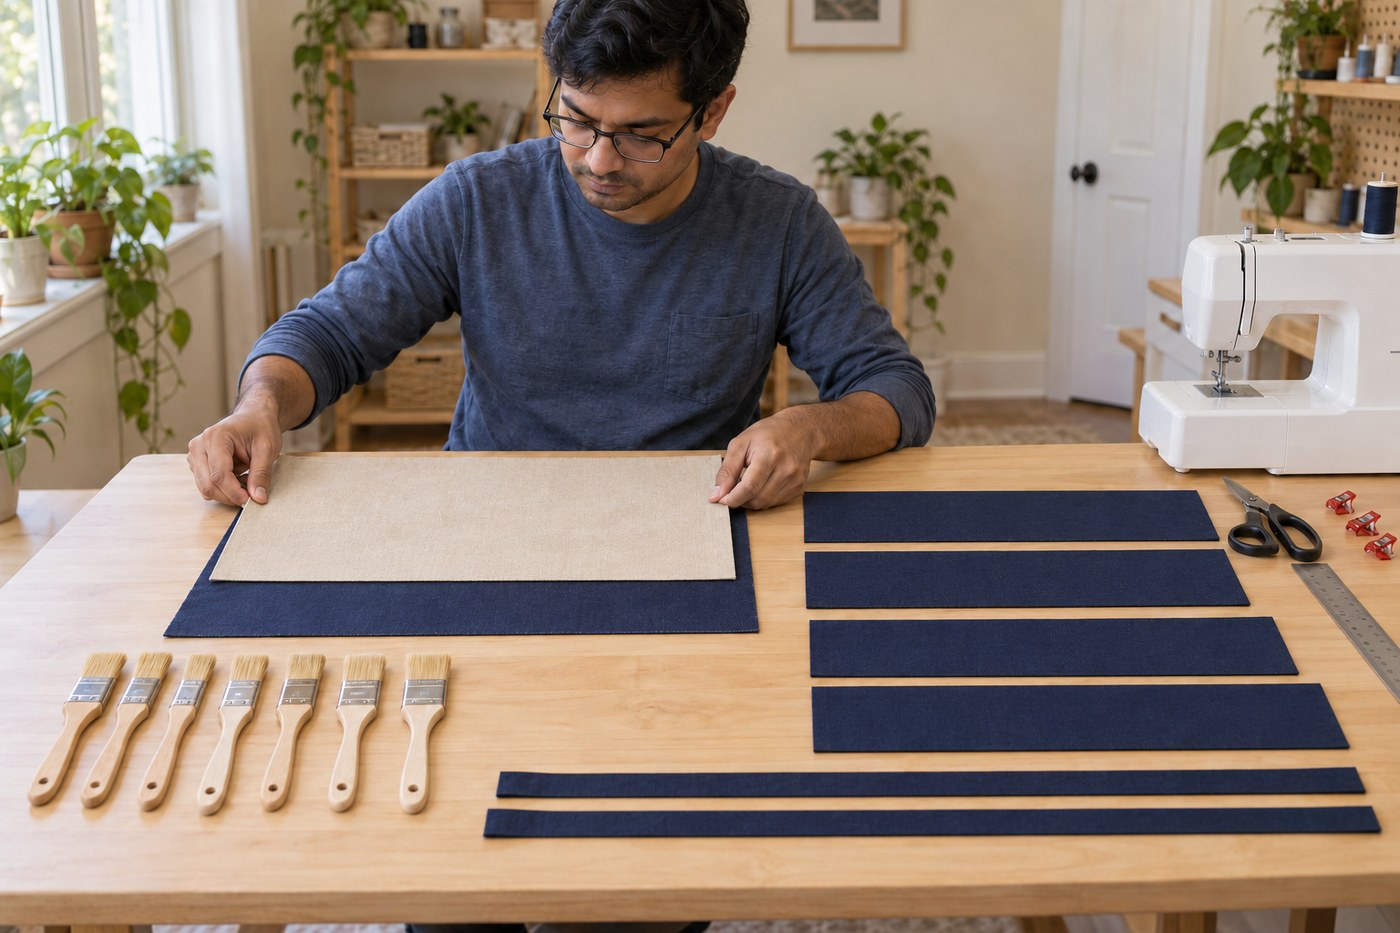
- Wheat-coloured canvas: one52×32cm outer pieceSearch Amazon Saudi Arabia ↗
- Navy cotton: one52×32cm lining pieceSearch Amazon Saudi Arabia ↗
- Navy cotton: two52×14cm pocket piecesSearch Amazon Saudi Arabia ↗
- Navy cotton: two48×14cm flap piecesSearch Amazon Saudi Arabia ↗
- Cotton twill tape: two75cm tiesSearch Amazon Saudi Arabia ↗
- Matching polyester sewing threadSearch Amazon Saudi Arabia ↗
- Your seven clean dry lightweight brushes20–24cm long for trial fitting
Step by step
Photorealistic illustration · Waey
1. Check the layout before cutting every part
Lay the intended tools side by side with room around their thickest parts. Our finished roll body is50×30cm with a12cm pocket and12cm retaining flap, suited to the illustrated20–24cm brushes. Confirm that the pocket will grip their handles while the flap reaches over their tops. Make a paper mock-up if your tools differ; short tools can disappear into deep pockets and thick tools need wider slots.
Photorealistic illustration · Waey
2. Prepare fabric and test the layer stack
Prewash compatible fabrics as their labels allow, press them flat and cut the listed rectangles square to the grain. The10mm seam allowance is already included; do not add it twice. Test a representative stack of canvas, lining and pocket on scraps with the chosen needle and thread. Check both sides for balanced stitches, then adjust the machine according to its manual before risking the cut pieces.
Photorealistic illustration · Waey
3. Sew the pocket’s clean top edge
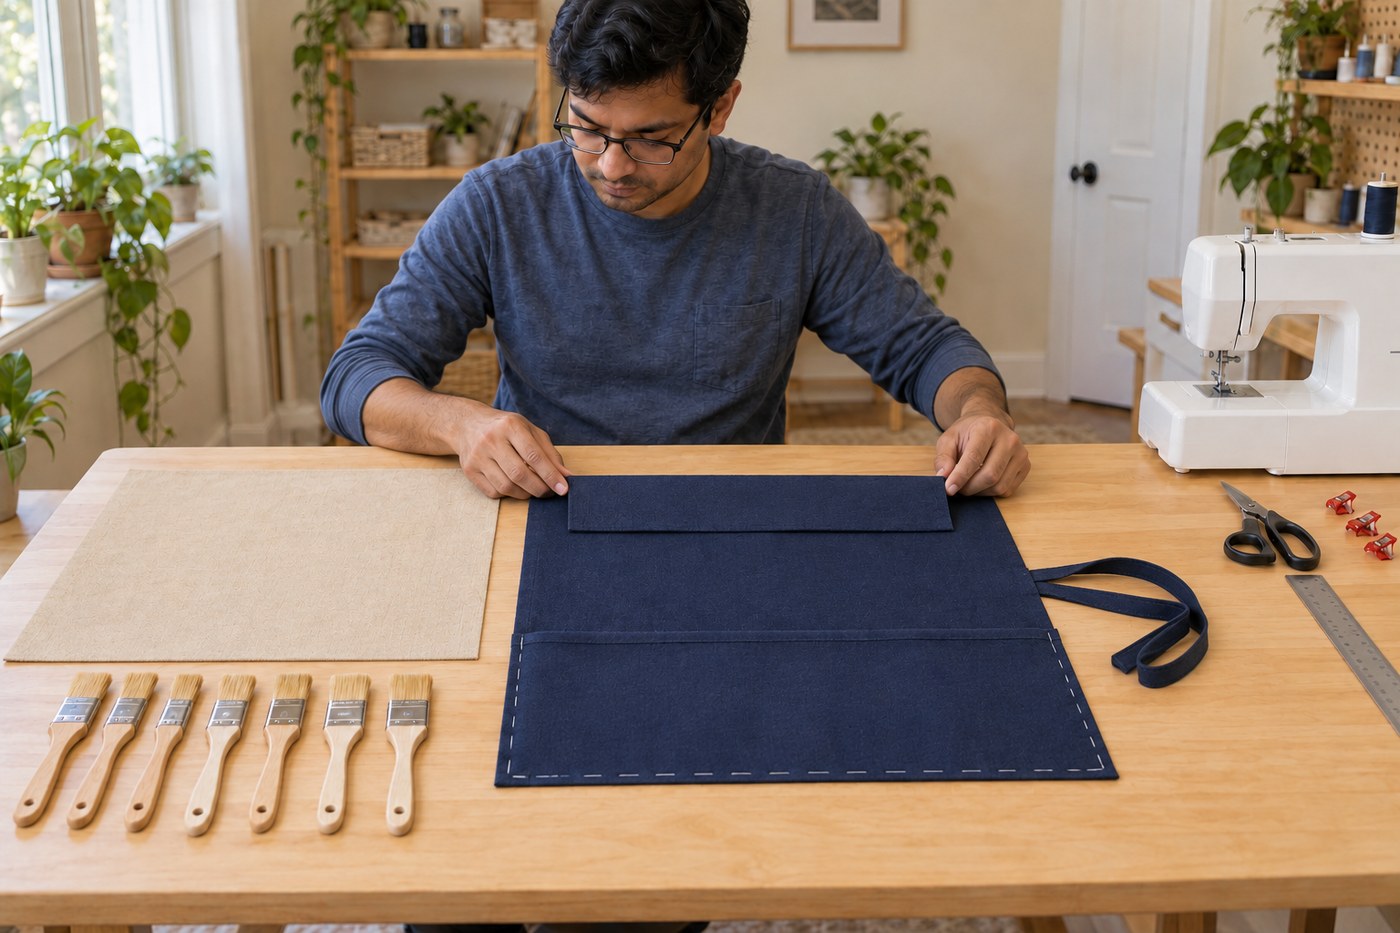
Place the two pocket rectangles right sides together and stitch one long52cm edge with a10mm seam. Press the seam, turn the pieces wrong sides together and press that joined edge into a neat fold. Topstitch beside the fold if the fabric needs support. Leave the lower and side edges raw for now: the body seam will enclose them, producing a12cm finished pocket after final assembly.
Photorealistic illustration · Waey
4. Make the retaining flap
Put the flap pieces right sides together and stitch both short sides and one long edge with10mm allowances, leaving the other long edge open. Trim corner bulk without cutting the stitches, turn and press with a blunt tool for the corners. The finished visible flap will be46cm wide and12cm deep once its remaining raw edge is enclosed in the body’s top seam. Keep that open edge clearly identified.
Photorealistic illustration · Waey
5. Baste parts and ties to the lining
Lay the lining right side up. Align the pocket’s raw lower and side edges with the lining’s bottom and sides. Centre the flap’s raw edge along the top, pointing its finished part inward. Baste these edges inside the final seam allowance. Place both tie ends at one side near mid-height, with their long lengths bundled inward so they cannot be accidentally caught around the perimeter.
Photorealistic illustration · Waey
6. Join the outer panel and turn the roll
Place the canvas right side down over the prepared lining and clip the perimeter. Leave a turning gap in the side away from the ties, then sew a10mm seam around the remaining perimeter, checking ties and flap stay inside. Trim corner bulk, turn through the opening and gently shape the corners. Press the opening allowances inward to match the stitched edge, taking care not to iron the ties into a twisted position.
Photorealistic illustration · Waey
7. Close the opening and mark fitted slots
Topstitch the body edges neatly, closing the turning gap and reinforcing the tie attachment with an extra short line where suitable. Keep the flap lifted clear of pocket division lines. Trial-fit every brush and mark slot boundaries with enough room for its thickest section, allowing for fabric wrapped around it. Remove all tools before sewing; tightly packed flat tools can still become bulky when the roll is closed.
Photorealistic illustration · Waey
8. Stitch divisions and test the loaded roll
Stitch each marked division from the pocket bottom to its finished top, securing both ends without sewing the retaining flap down. Reload the tools, fold the flap over their tops and roll from the side opposite the ties. Wrap and tie without crushing bristles or bending tools. Shake gently over the table to check retention. Enlarge any tight slot by unpicking and resewing it rather than forcing a brush into it.
Video demonstrations
Fabric Tool Tool Assembly
Shows related fabric-layer assembly with a different pattern. Use the cut plan and seam allowances written here.
CraftsEverywhere by Erin · English
Watch on YouTube ↗SEW A TOOL ROLL FOR GIFTS - They Actually Want This
Shows pocket marking, machine stitching and finishing with a different pattern. Use the measurements and fitted-slot checks written here.
Christine's Crafts · English
Watch on YouTube ↗Final checks
Every slot fits without force; tie anchors hold; retaining flap covers tool tops; no needles remain. Store only dry clean tools and clean the empty roll according to the fabrics’ care limits.
Sources
BERNINA WeAllSew: Custom fitted pocket and retaining-flap method ↗
Photographic illustrations generated for Waey. External videos belong to their credited creators.