
Sew a lined fabric storage bin with boxed corners
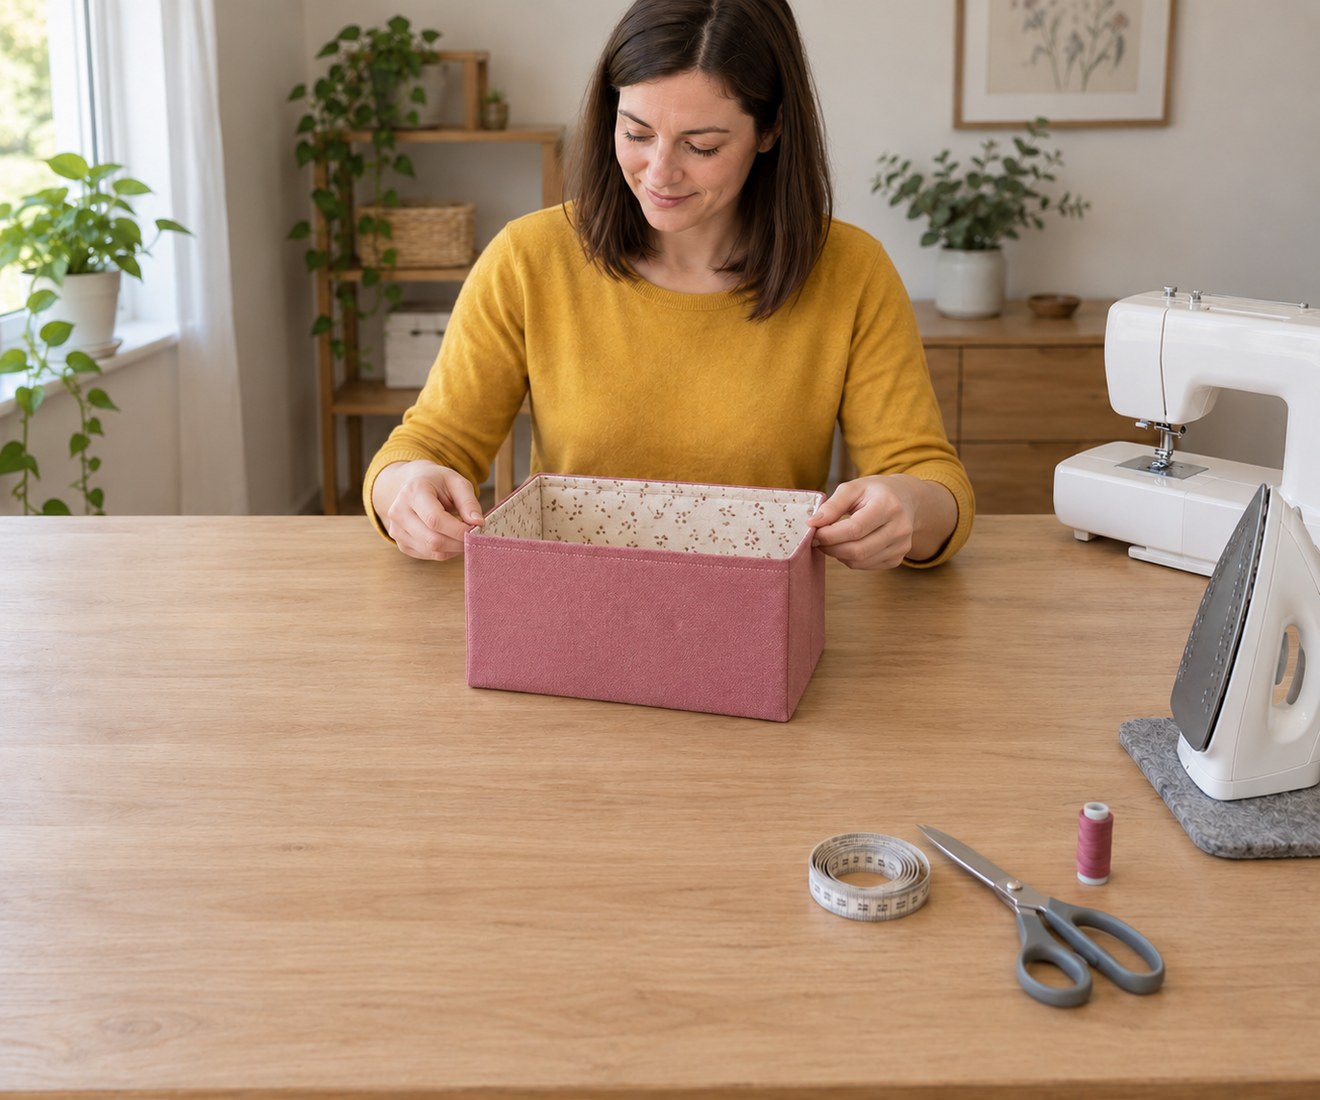
Make an open fabric bin with a flat rectangular base, enclosed upper seam and washable lining. This original cut plan targets a finished width of 20 cm, depth of 15 cm and height of 15 cm, without handles.
What will you learn?
Make an open fabric bin with a flat rectangular base, enclosed upper seam and washable lining. This original cut plan targets a finished width of 20 cm, depth of 15 cm and height of 15 cm, without handles.
Tools
- Sewing machineSearch Amazon South Africa ↗
- Fresh machine needle suitable for the fabric layersSearch Amazon South Africa ↗
- RulerSearch Amazon South Africa ↗
- Tape measureSearch Amazon South Africa ↗
- Washable fabric markerSearch Amazon South Africa ↗
- Fabric scissorsSearch Amazon South Africa ↗
- Sewing clipsSearch Amazon South Africa ↗
- Seam ripperSearch Amazon South Africa ↗
- IronSearch Amazon South Africa ↗
- Pressing clothSearch Amazon South Africa ↗
- Heatproof pressing surfaceSearch Amazon South Africa ↗
- Blunt fabric-turning toolSearch Amazon South Africa ↗
- Hand-sewing needle and thimble if closing the lining by handSearch Amazon South Africa ↗
Materials
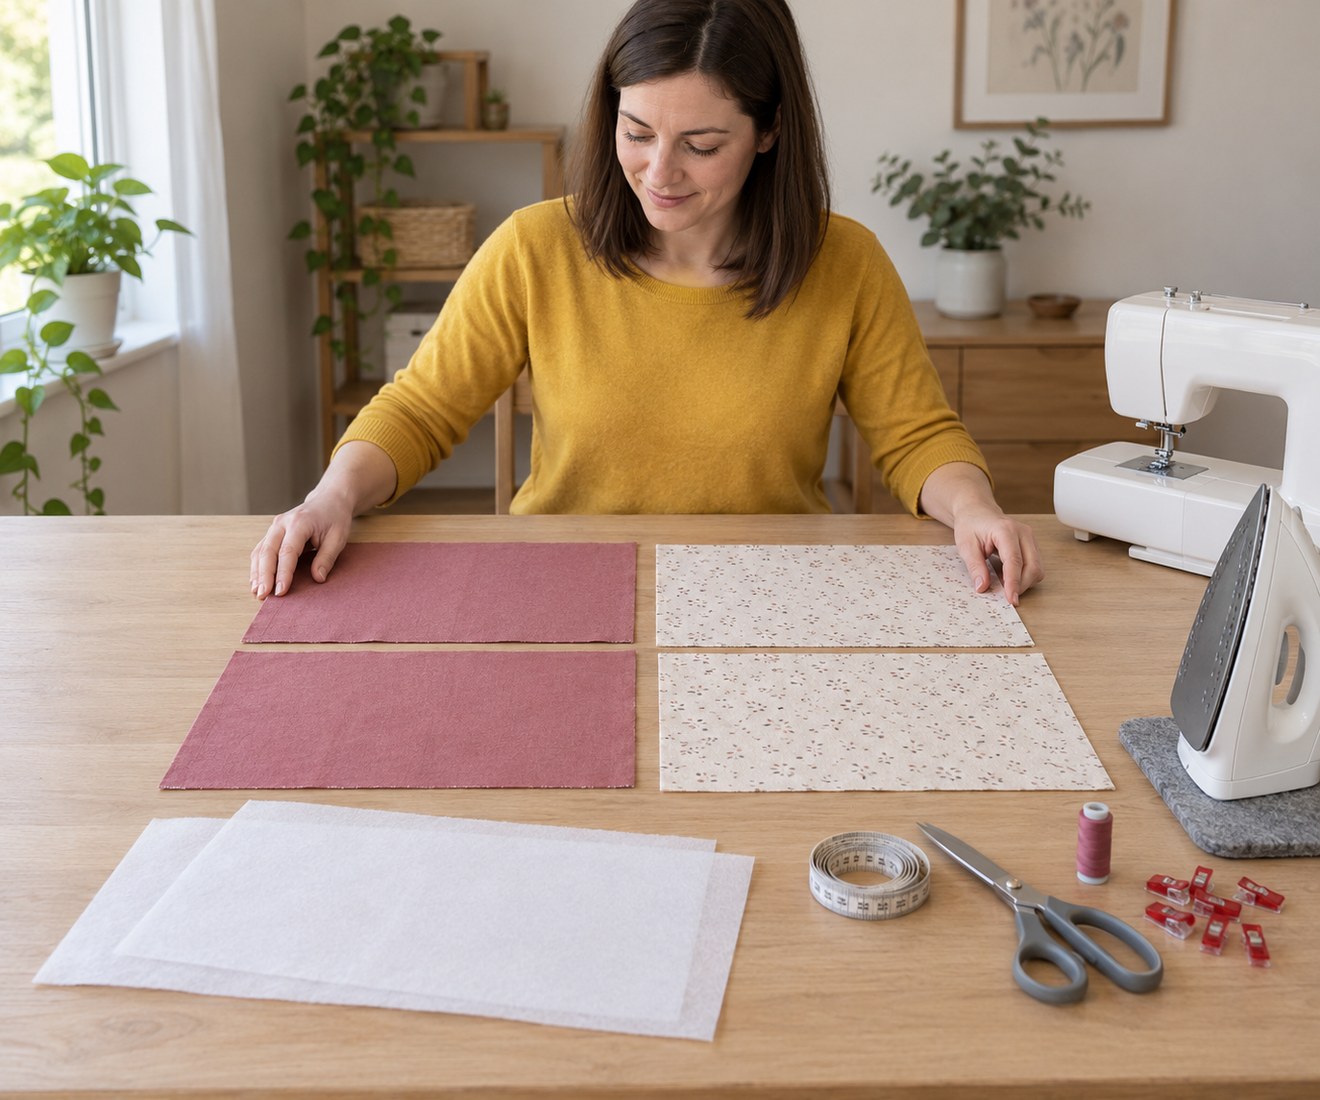
- Two outer canvas rectangles, each 37 × 24.5 cmSearch Amazon South Africa ↗
- Two cotton lining rectangles, each 37 × 24.5 cmSearch Amazon South Africa ↗
- Compatible medium-weight fusible interfacing for the two outer rectangles, cut and applied to its instructionsSearch Amazon South Africa ↗
- Matching sewing threadSearch Amazon South Africa ↗
Step by step
Photorealistic illustration · Waey
1. Calculate the bin and prepare stable fabrics
Use the 37 cm edges as the top width and the 24.5 cm edges as the height of every piece. With 1 cm seams, the flat pouch width becomes 35 cm; boxing 15 cm corners leaves a 20 cm front. The finished height is 24.5 minus two 1 cm seam allowances minus half the 15 cm depth, giving 15 cm. Prewash, dry and press compatible fabrics before cutting so later shrinkage does not distort the lining.
Photorealistic illustration · Waey
2. Cut four rectangles and apply the interfacing
Cut two outer and two lining rectangles square, checking opposite edges match before sewing. Fuse suitable interfacing to the wrong sides of the outer pieces using its own heat, moisture and pressing-time instructions. Test a scrap first and let the pieces cool flat before moving them. Do not slide the iron across soft adhesive or substitute an untested hot setting; bubbles and shrinkage can spoil the shape before construction begins.
Photorealistic illustration · Waey
3. Sew separate outer and lining pouches
Place the two outer pieces right sides together and sew both short sides and the bottom long edge with a consistent 1 cm allowance, securing seam ends. Leave the top open. Repeat for the lining, but leave an 8 cm turning gap in the middle of its bottom seam and secure both gap ends. Press the allowances open where accessible. Keep this gap away from the future boxed corners so it remains usable after shaping.
Photorealistic illustration · Waey
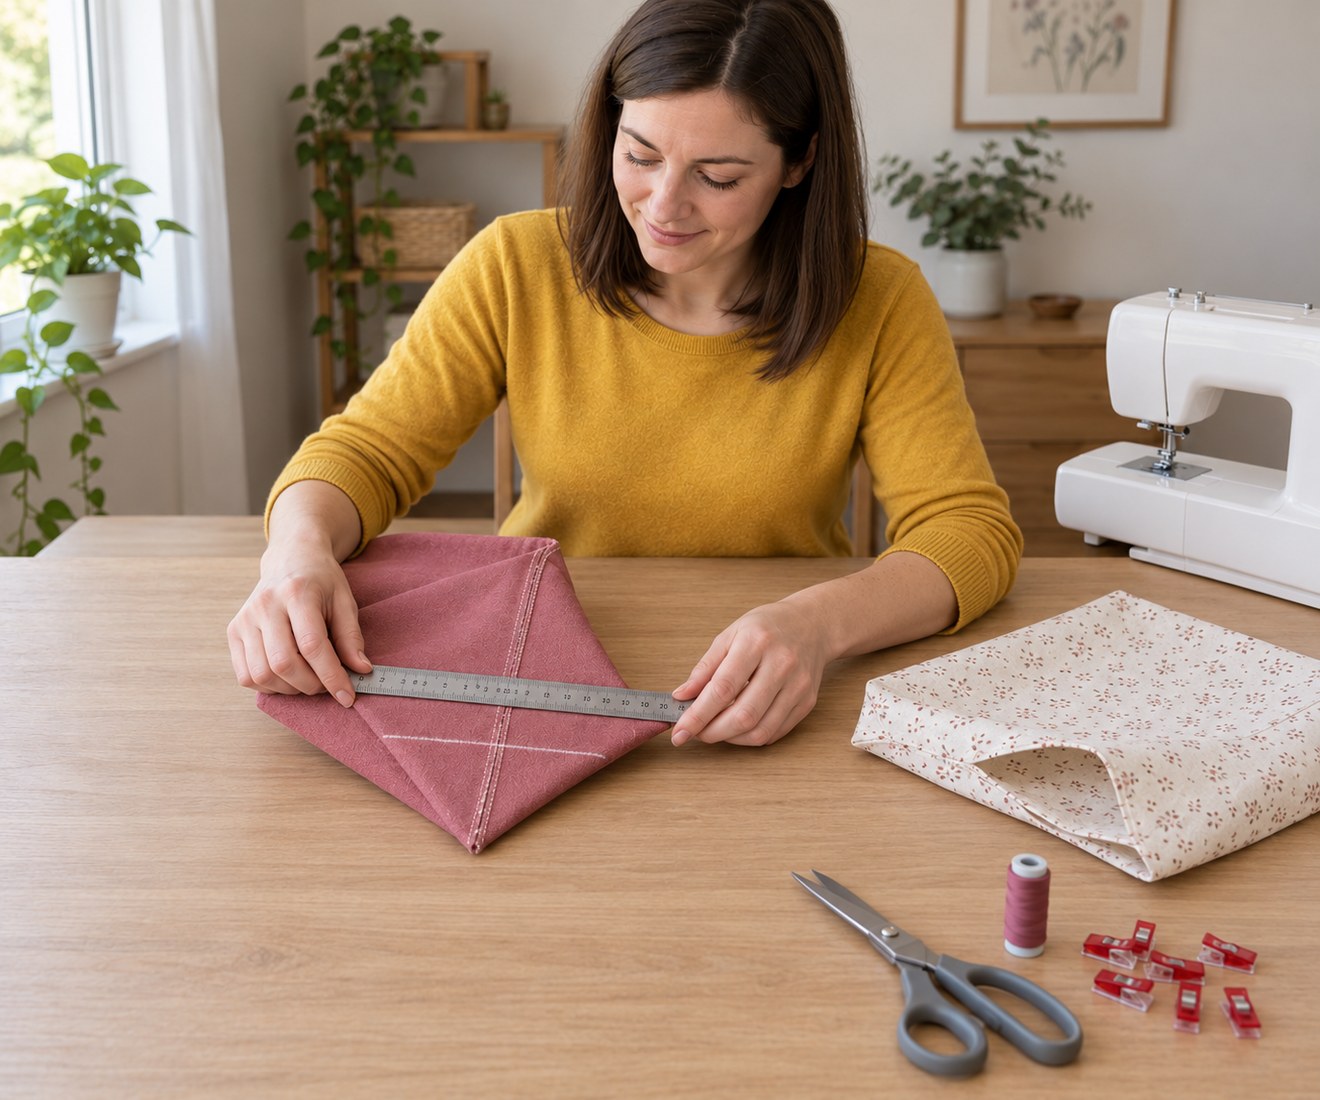
4. Align each corner and mark a 15 cm boxing line
With a pouch wrong side out, open one lower corner into a triangle. Match the side seam directly over the bottom seam and flatten the allowances without twisting the cloth. Mark a line perpendicular to the aligned seams where its total width between folded edges is 15 cm; the centre lies about 7.5 cm from the sewn corner tip. Check both halves are equal, then repeat for the other corner and both lining corners.
Photorealistic illustration · Waey
5. Stitch the boxed bases and compare their fit
Stitch across all four marked corner lines, securing both ends. Check the outside basket shape before cutting away the triangular tips; a misplaced seam is easier to undo while the excess remains. When all corners match, trim each tip leaving about 1 cm seam allowance and press the corner seams. Trial-fit outer and lining with their bottoms touching. Correct a twisted corner or major mismatch now, rather than trapping it inside the completed top seam.
Photorealistic illustration · Waey
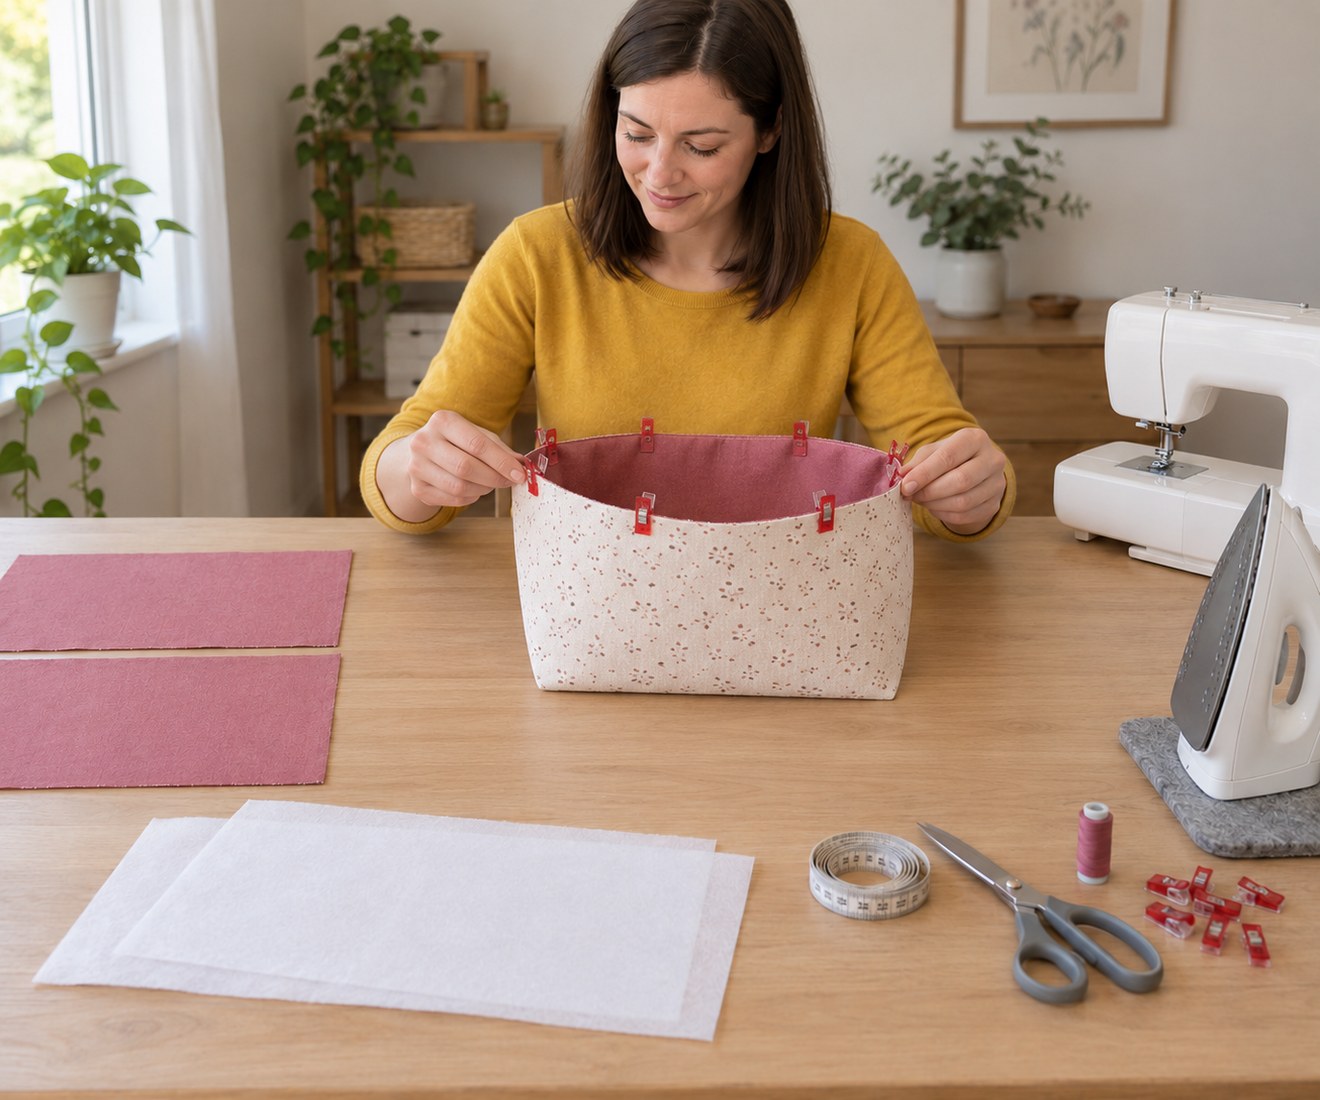
6. Nest right sides together and join the upper edge
Turn the outer basket right side out and leave the lining wrong side out. Place the outer basket inside the lining so their right sides touch. Match side seams and clip the raw upper edges evenly around the opening, keeping the lining turning gap free below. Sew the full upper edge with a 1 cm allowance, removing clips as you approach them. Do not stitch across the opening or accidentally catch the opposite wall beneath the needle.
Photorealistic illustration · Waey
7. Turn through the lining gap and settle the corners
Gently draw the outer basket through the lining’s bottom gap, then bring the lining through until both right sides are visible. Push the lining down inside the outer bin and align the four boxed corners by hand. Use a blunt turning tool only with light pressure; a sharp point can pierce the fabric. Roll the upper seam between your fingers so it sits neatly at the edge, with no large lining ridge spilling onto the exterior.
Photorealistic illustration · Waey
8. Close the gap and topstitch the rim
Fold the lining gap allowances inward to match the original 1 cm seam line and close the gap securely with small hand stitches or a narrow machine seam. Press the upper edge using the safe settings for all layers, then topstitch about 3 mm below the rim around the complete opening. Keep the lining smooth and remove every clip before sewing over its position. There is no folded cuff in this design; its stated height assumes the rim remains upright.
Photorealistic illustration · Waey
9. Check stability and load only light dry contents
Stand the empty bin on a flat surface and check the boxed base rests evenly without a twisted corner. Count and remove pins, needles and clips, then add a few light folded fabric pieces or sewing supplies. Support the base whenever moving the filled bin; the top seam is not a carrying handle. If the walls collapse, reduce the contents or revise the stabilizer choice in a future build. Follow the strictest fabric and interfacing care instructions when cleaning.
Video demonstrations
How to Make a Fabric Basket | Easy Sewing Tutorial
Chic n Scratch shows sewing and joining a lined basket. It uses a different pattern; follow this guide’s cut sizes, 1 cm seams and 15 cm corner lines.
ChicnScratch · Caption metadata available; spoken language unconfirmed
Watch on YouTube ↗how to sew large fabric storage boxes, fabric boxes, fabric storage tutorial,fabric baskets tutorial
Wandee shows preparation for a larger handled fabric box. Its sizes, layers, handles and spray adhesive are outside this design.
wandee easy sewing · Caption and spoken language unconfirmed
Watch on YouTube ↗Final checks
Four even boxed corners, a closed lining gap, smooth rim, no trapped clips or needles, and a stable base under light contents. Finished measurements are approximate and depend on accurate seams and fabric behaviour.
Sources
Sweet Red Poppy: lined bins and boxed-corner assembly ↗
Everything’s Famtastic: custom sizing and boxed corners ↗
Original generated instruction illustrations created for Waey. Videos belong to their credited creators.